A few more steps to finish up the box....

This is the front being glued on. I use old scraps on the front and back to keep the c-clamps from marring the surface of the box since c-clamps can and will dig into the wood being clamped together this way....
You'd think this wouldn't matter since the wood I used to build the camera is kind of gnarly, but old habits die hard.
It's just good practice to keep everything protected when gluing and clamping..
That piece on the top is an old pinhole box face that didn't work out...it may have another life as something else down the road.
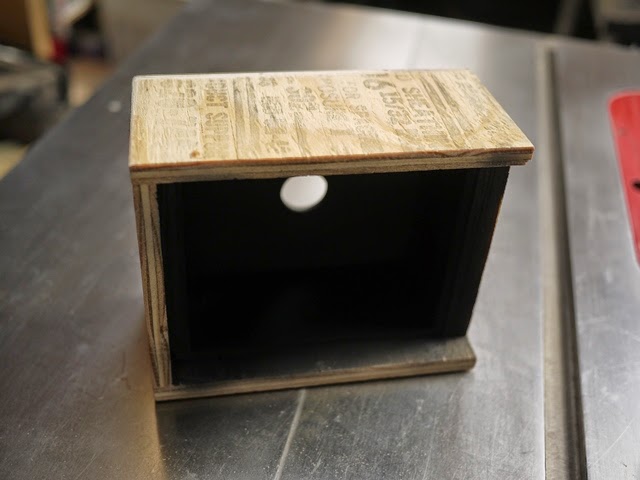
This is the rear view looking into the box. A quick spray of flat black paint keeps internal reflections to a minimum.
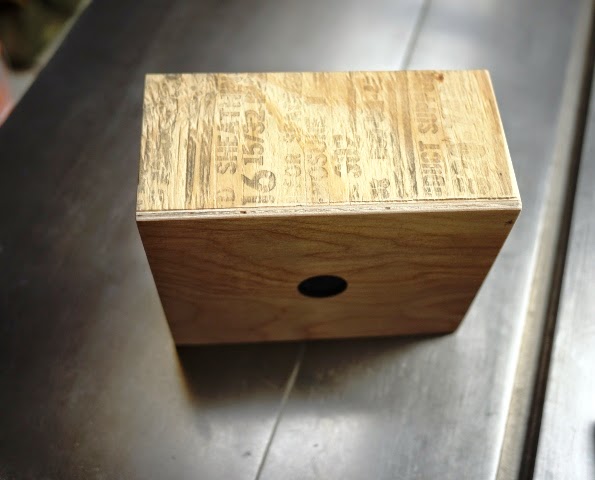
This view shows the top of the camera with that wood grade marking I talked about earlier.
I like this! I'm probably going to apply some polyurethane to seal it and then install the pinhole and call this one done!
Oh, before I forget, I'm drilling the pinhole myself with a micro drill and some brass shim stock.
The box works out to be f/192..
Thanks for stopping by!
P.S. There is a flange inside the box to rest the film-holder on. It's not easy to see, but I did make one out of some pieces of scrap.
Great tutorial, and I like the look of this box. Regarding the film holder, is there an inner flange against which the border of the holder rests?
ReplyDeleteHi!
ReplyDeleteYes, I did add the flange to rest the film-holder on inside the box.
It's not easy to see since I painted the interior black.
Thanks for stopping by!
I would be interested in knowing more about your micro drill.
ReplyDelete